
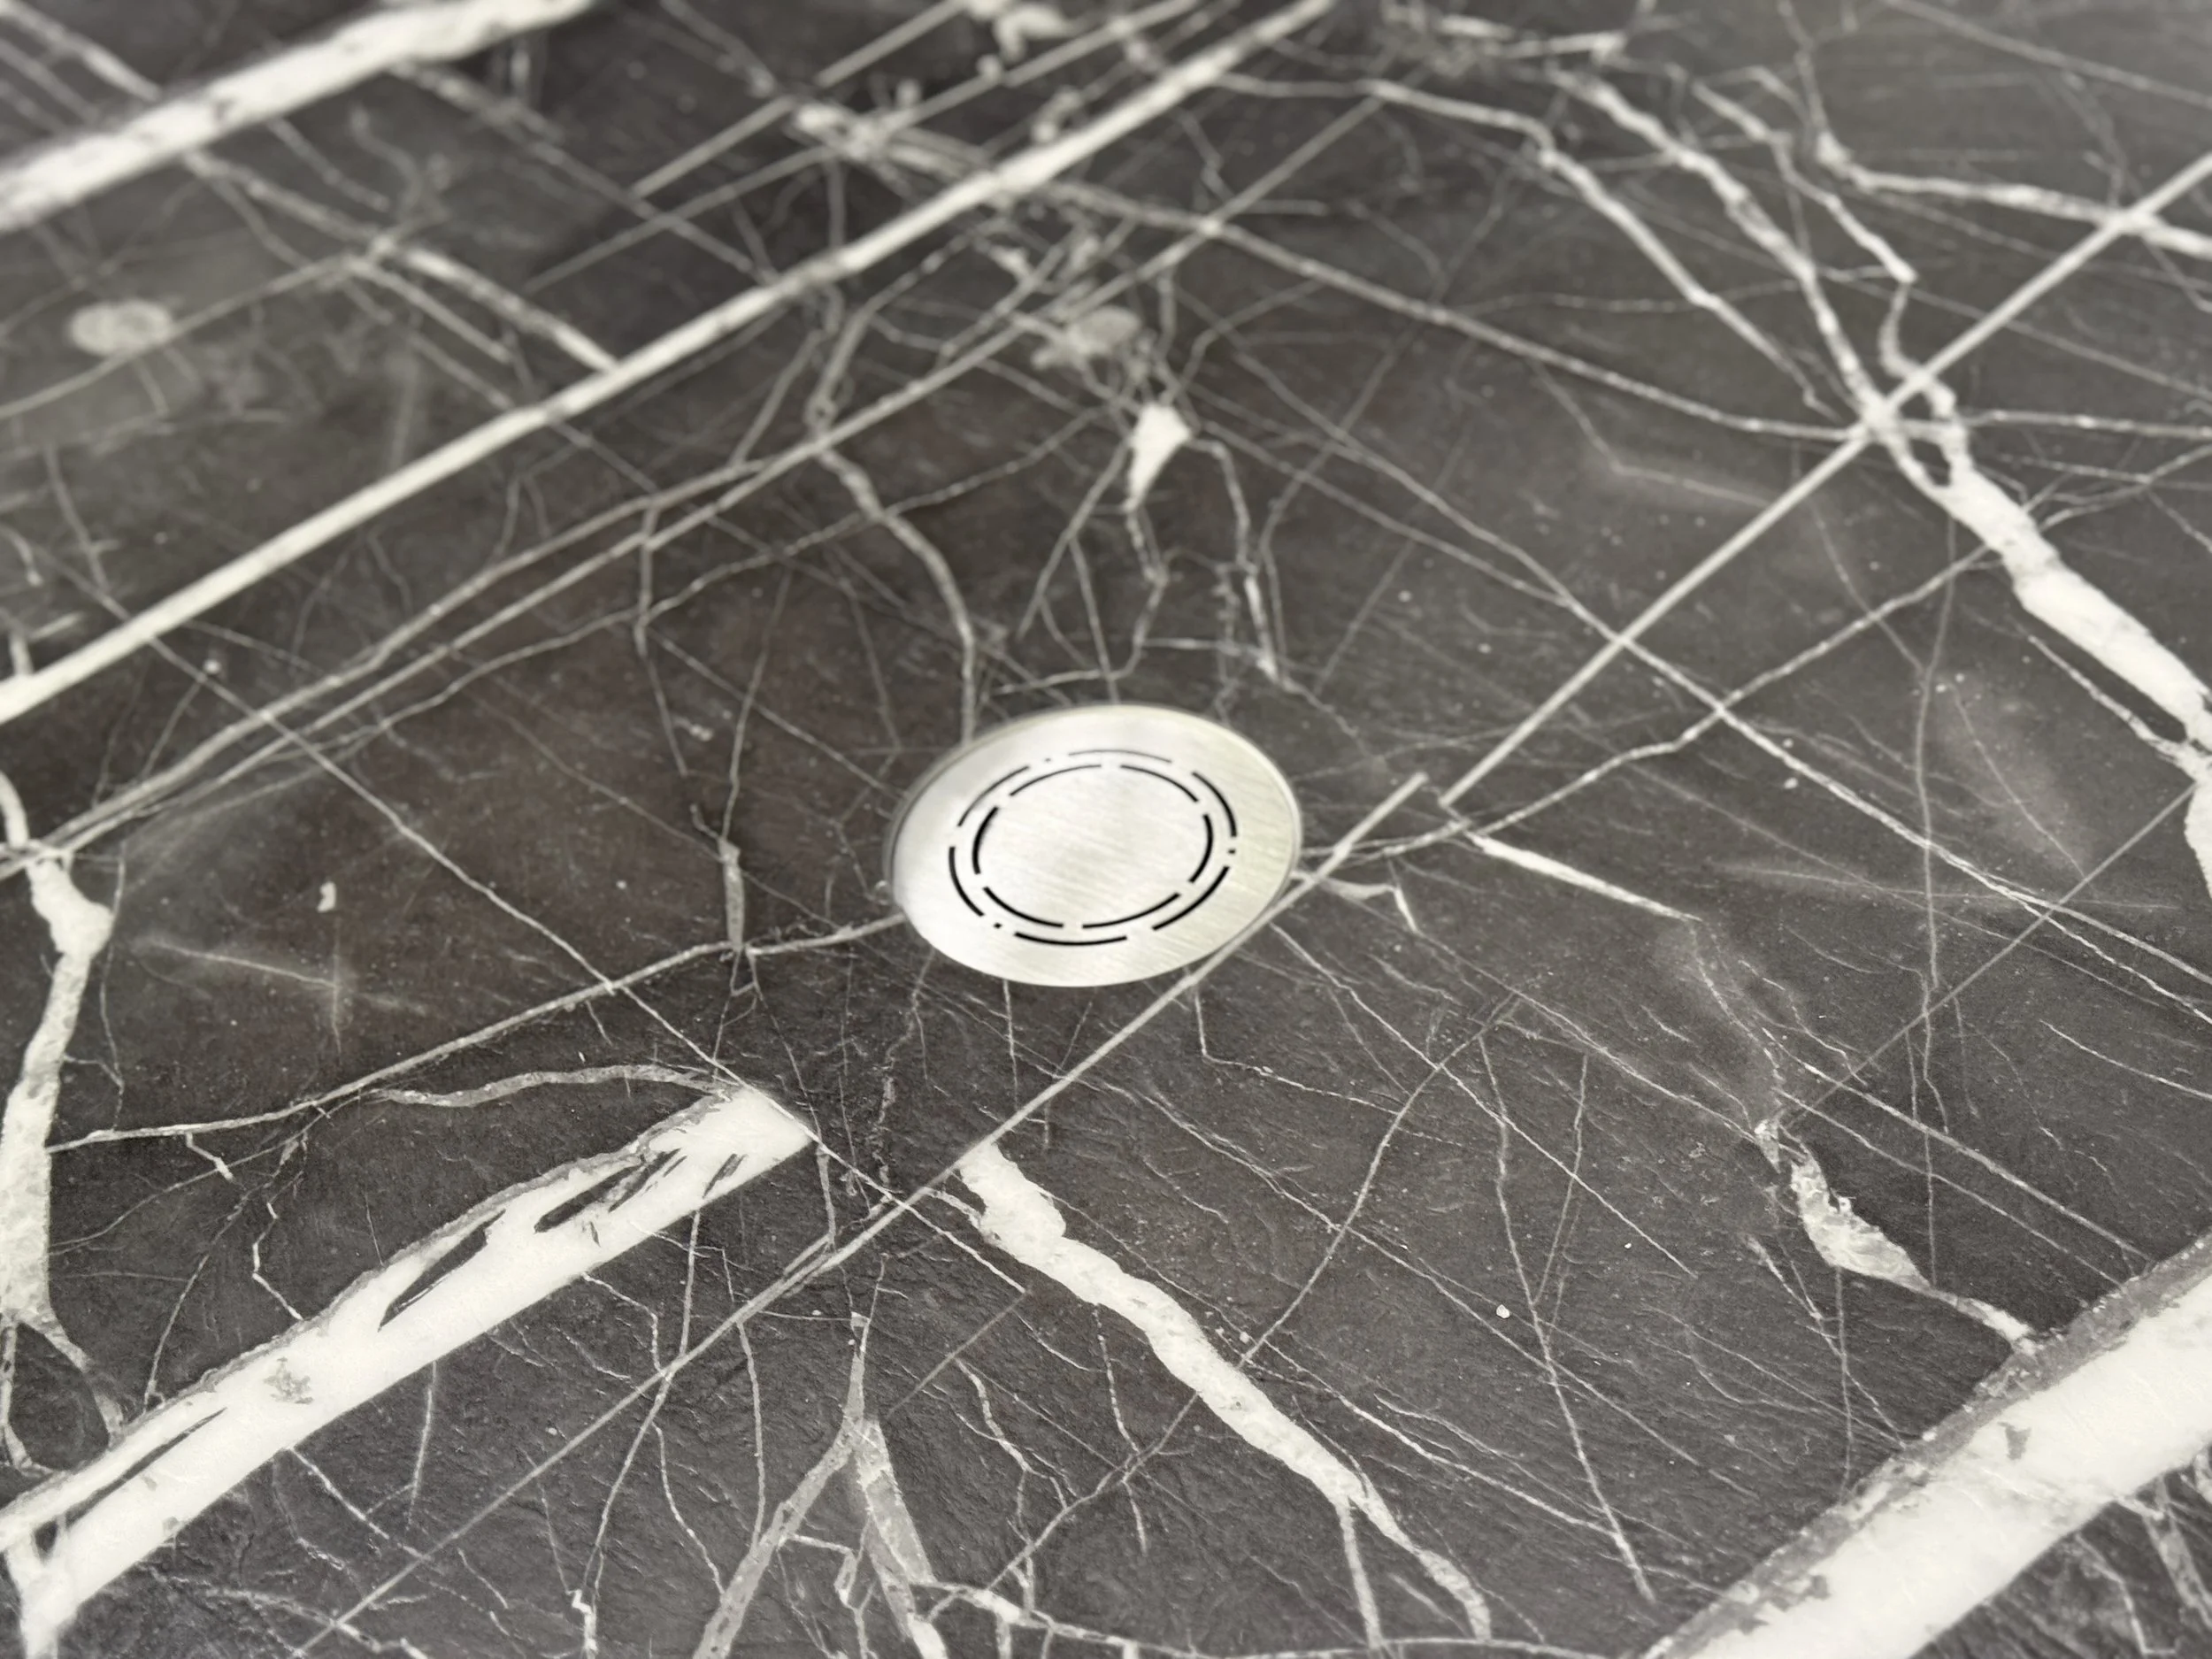
Magnetic Shower Drains
Easy Access. Seamless Design.
Tyvarian is known for bringing cutting-edge innovation and endless design possibilities to shower walls, floors, and surfaces. Our magnetic designer drain covers extend that innovation to the shower floor — creating a seamless design experience that complements Tyvarian shower pans and wall surrounds.
The Magic is Magnetic!
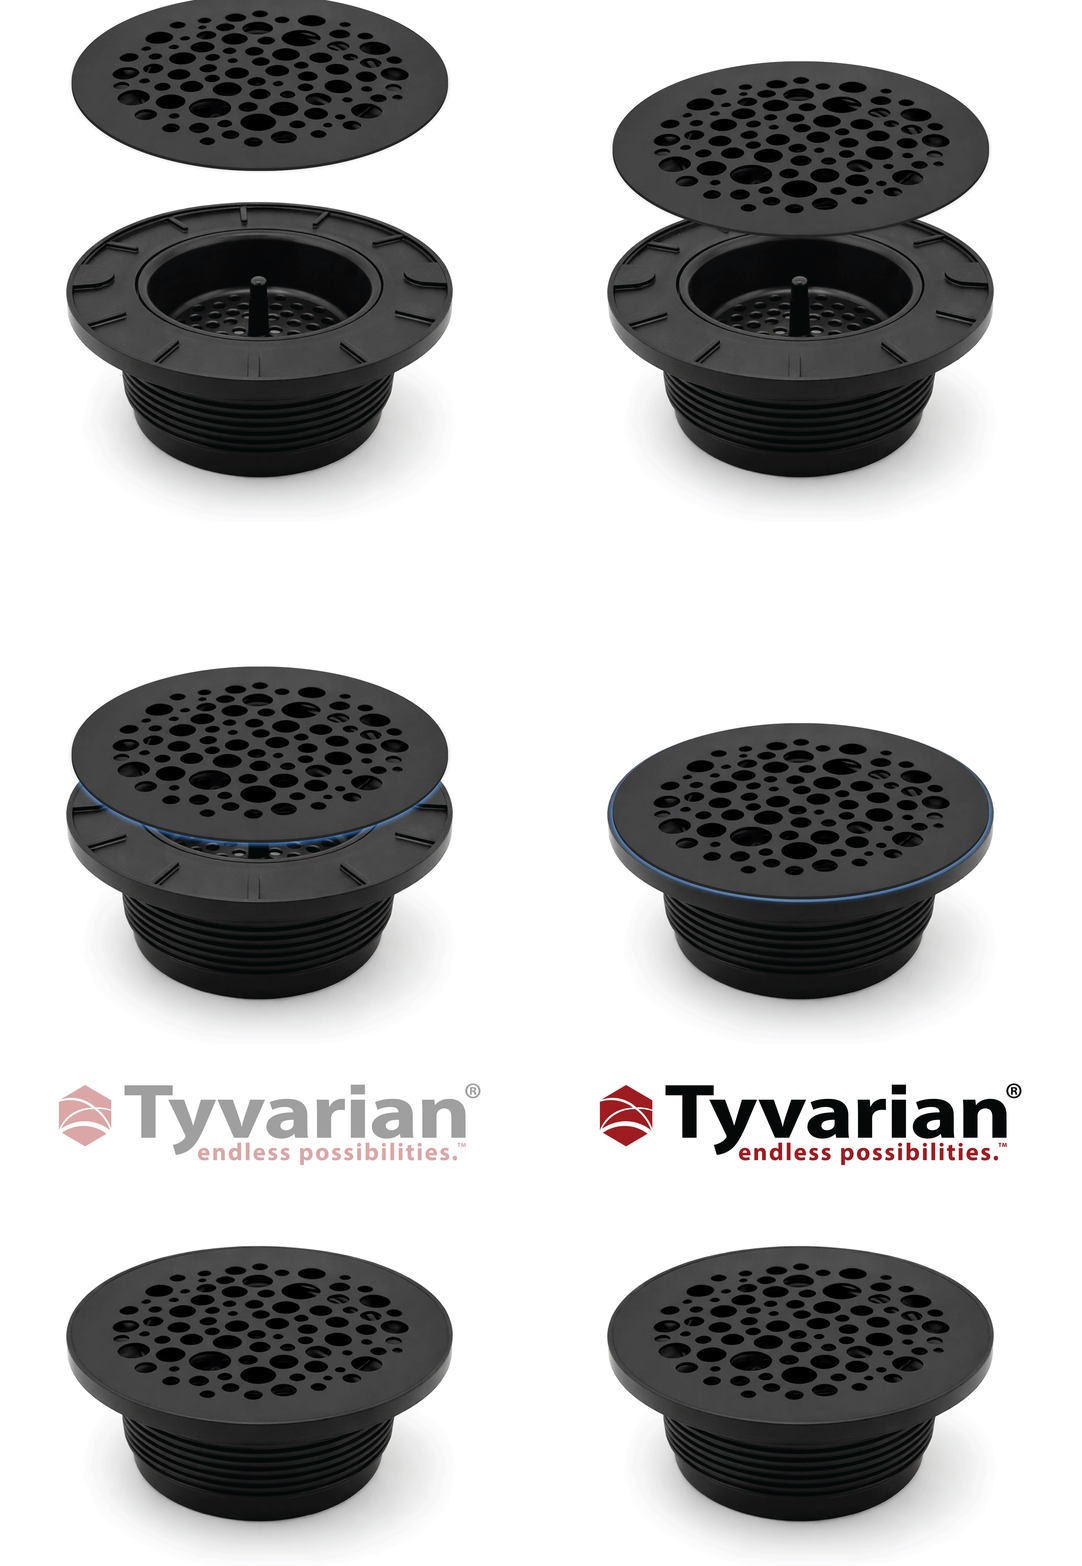
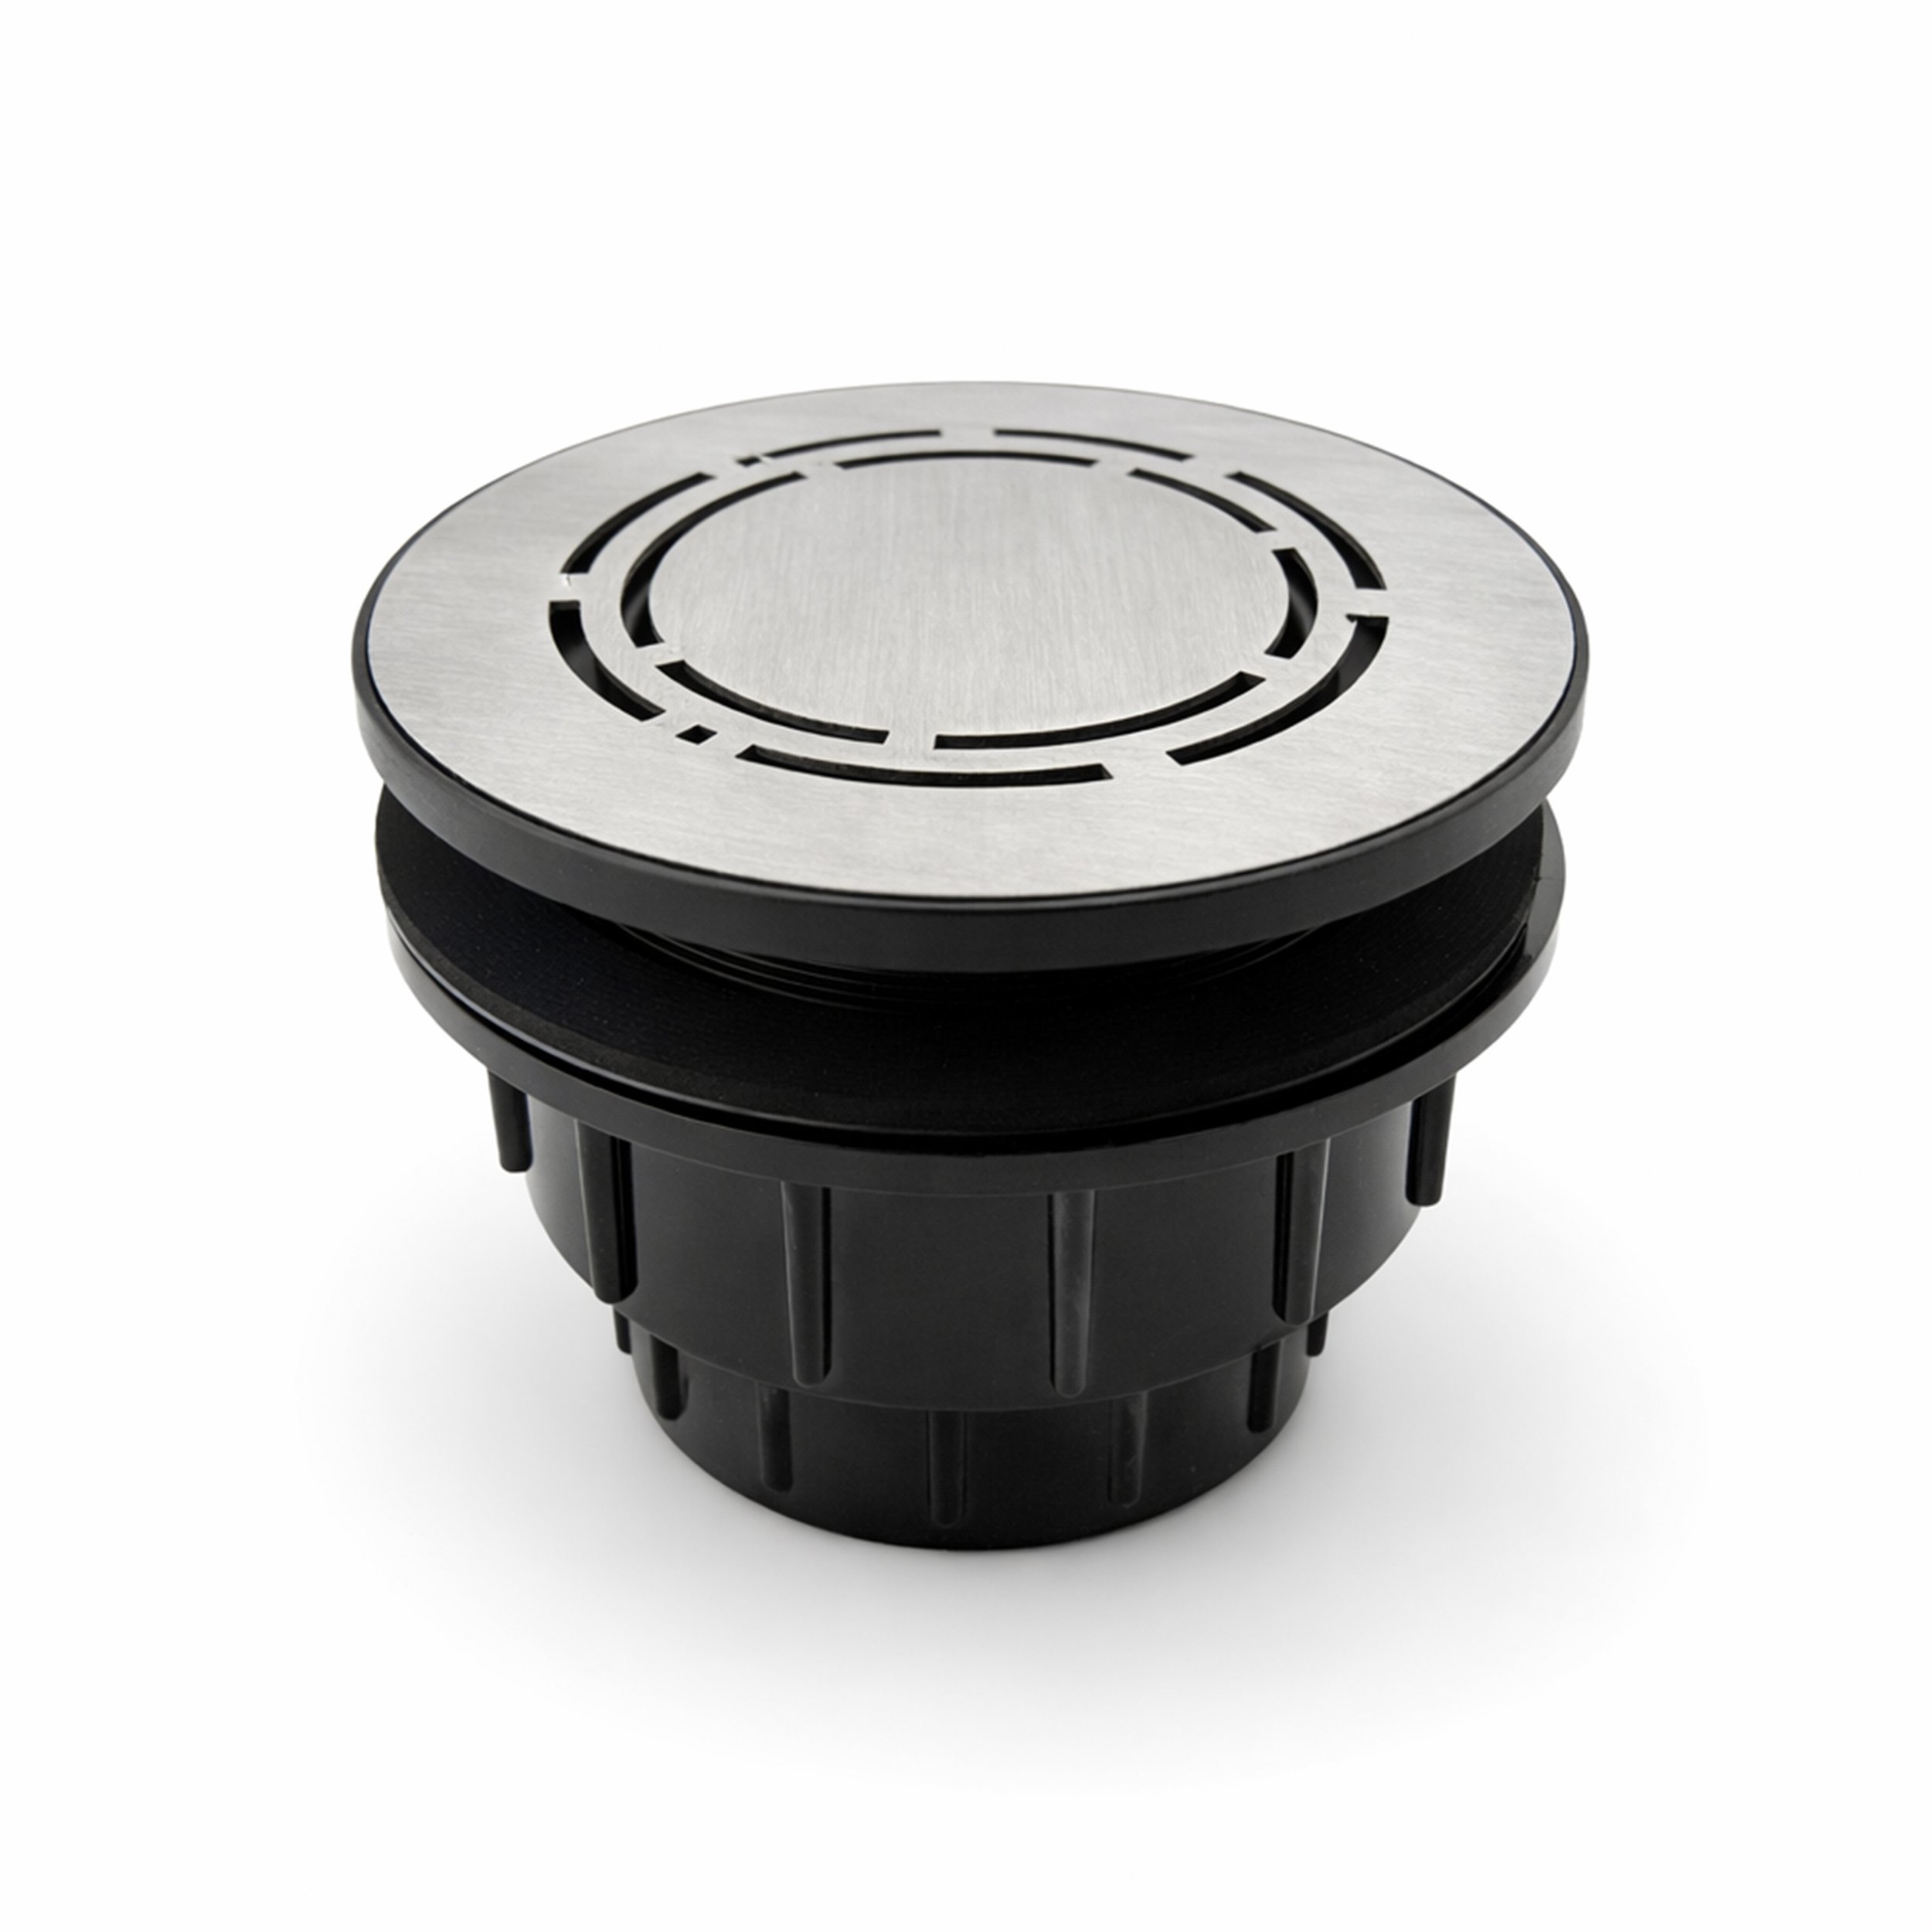
Hidden magnetic attachment - no visible screws or fasteners
Lift-off cover allows easy cleaning and maintenance
Perfect alignment every time - simply drop the cover into place
Creates a clean, uninterrupted shower floor design
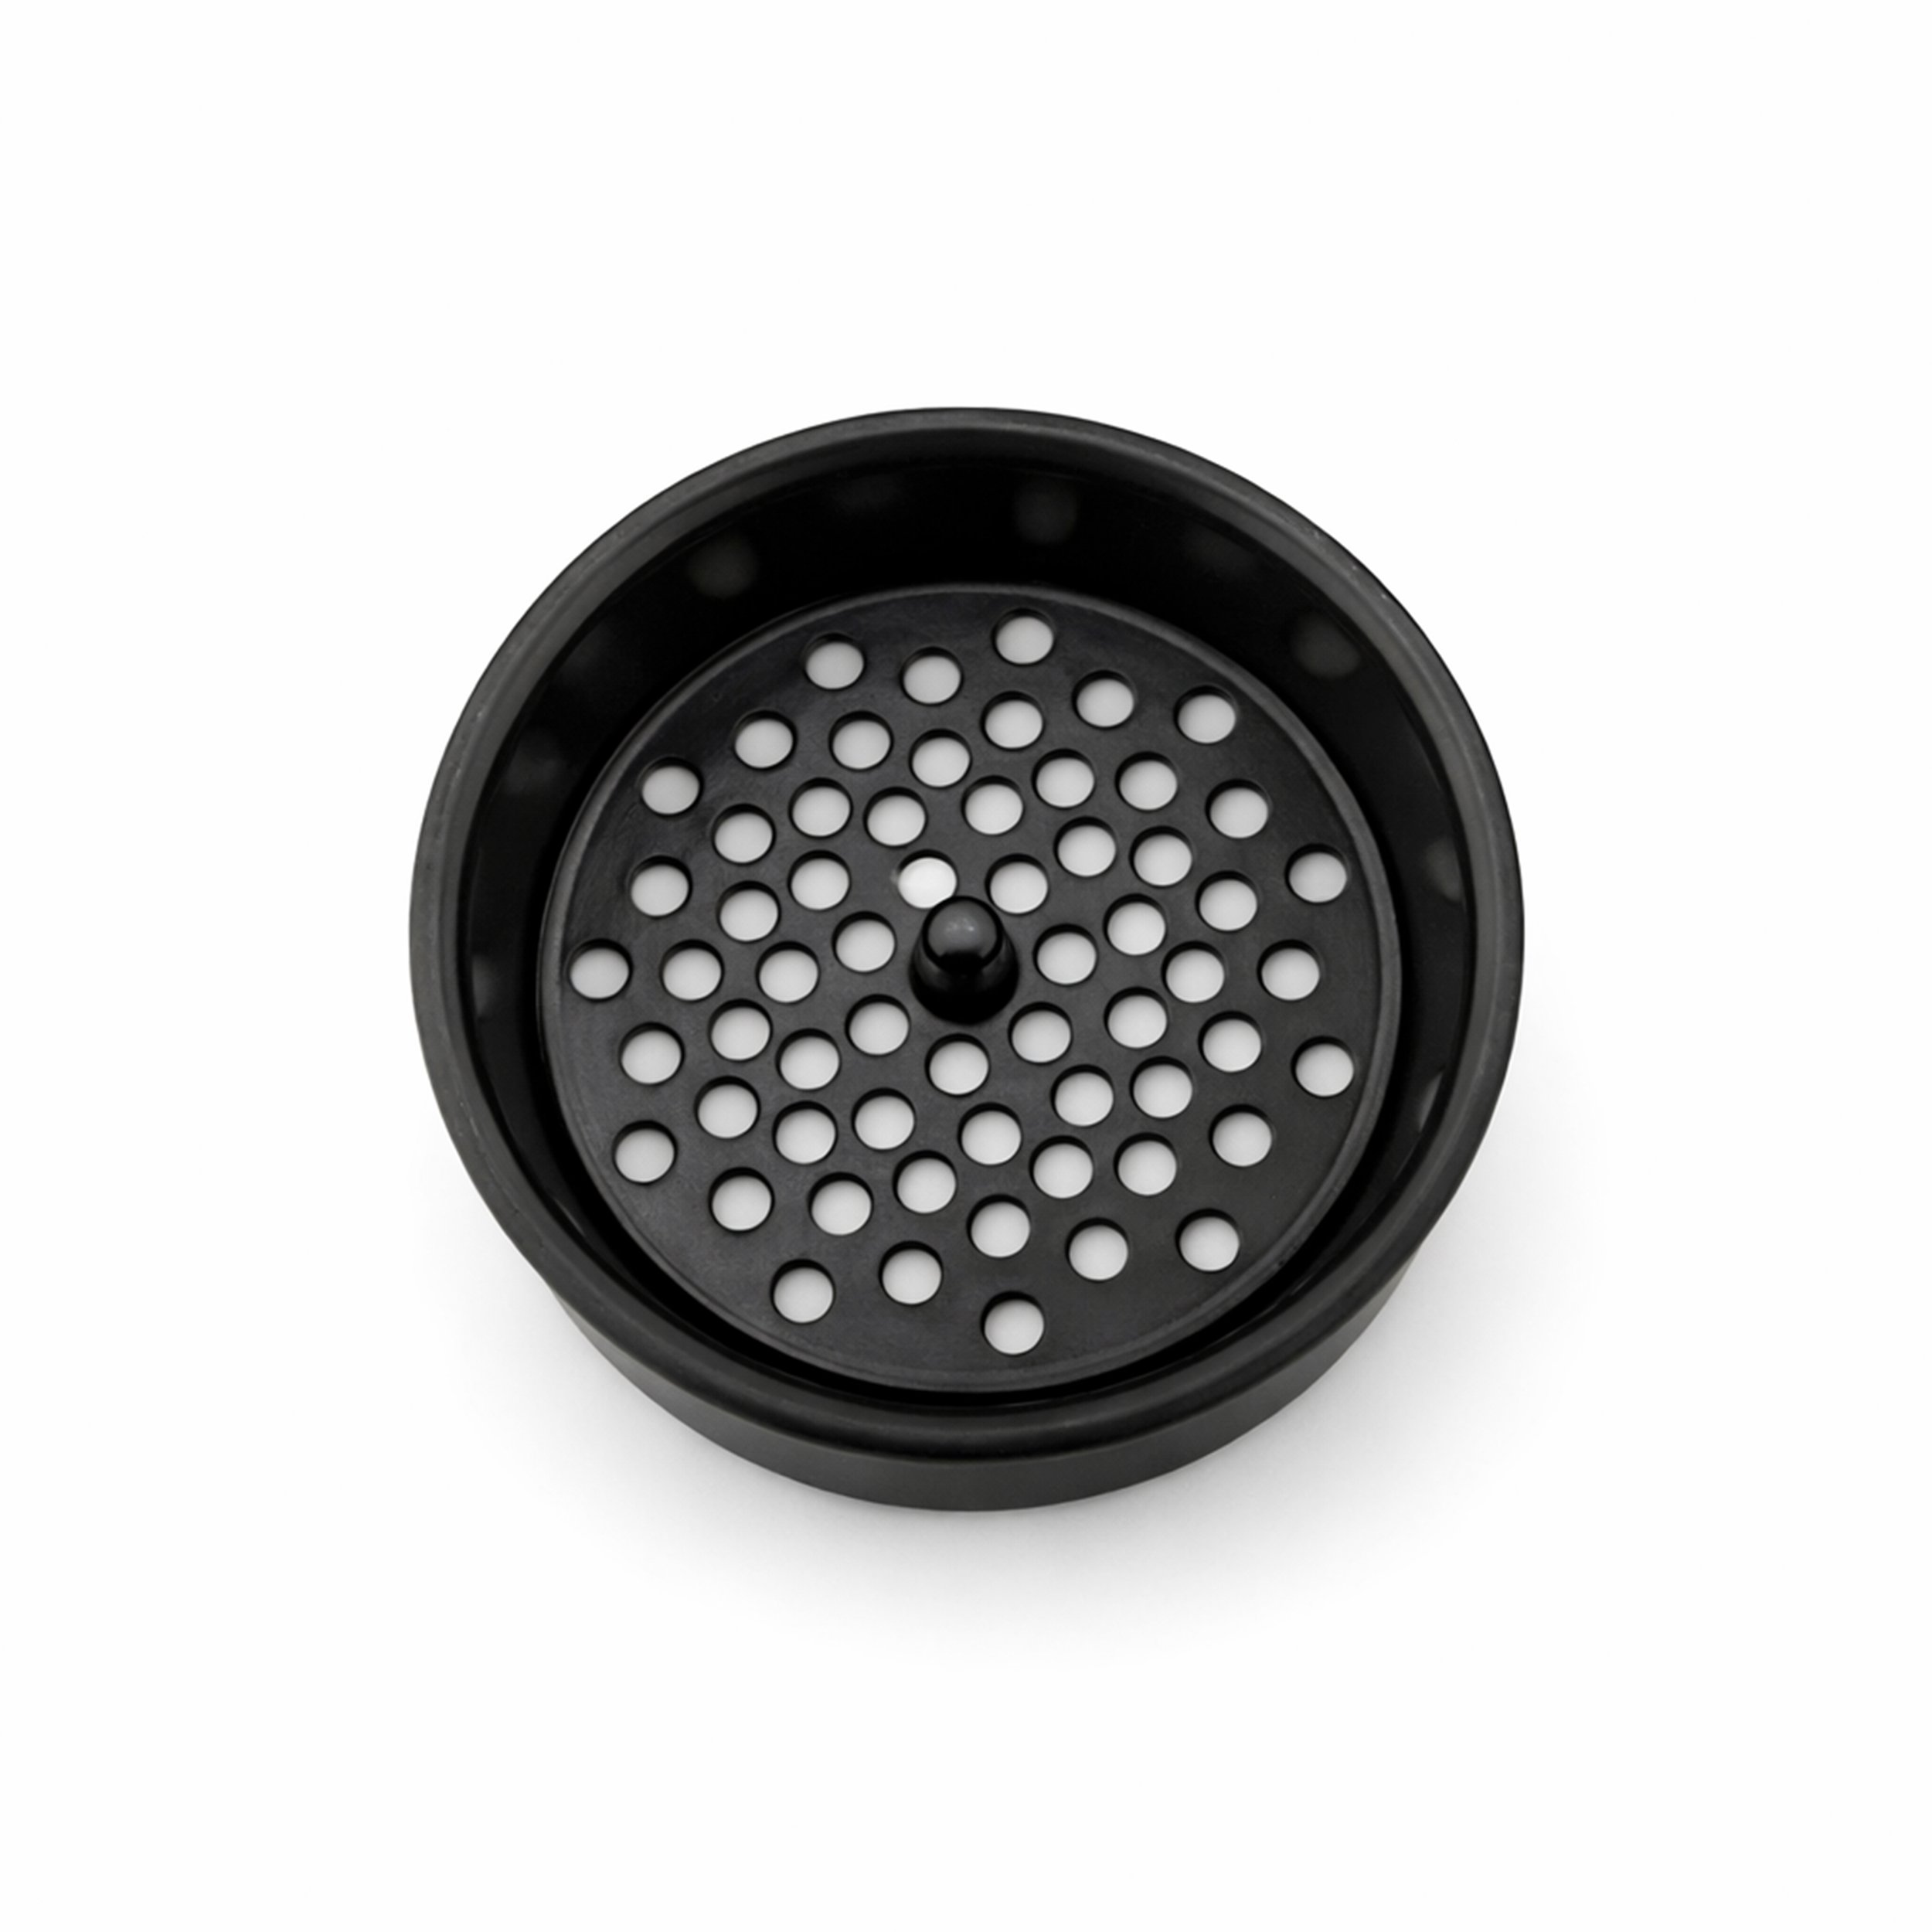
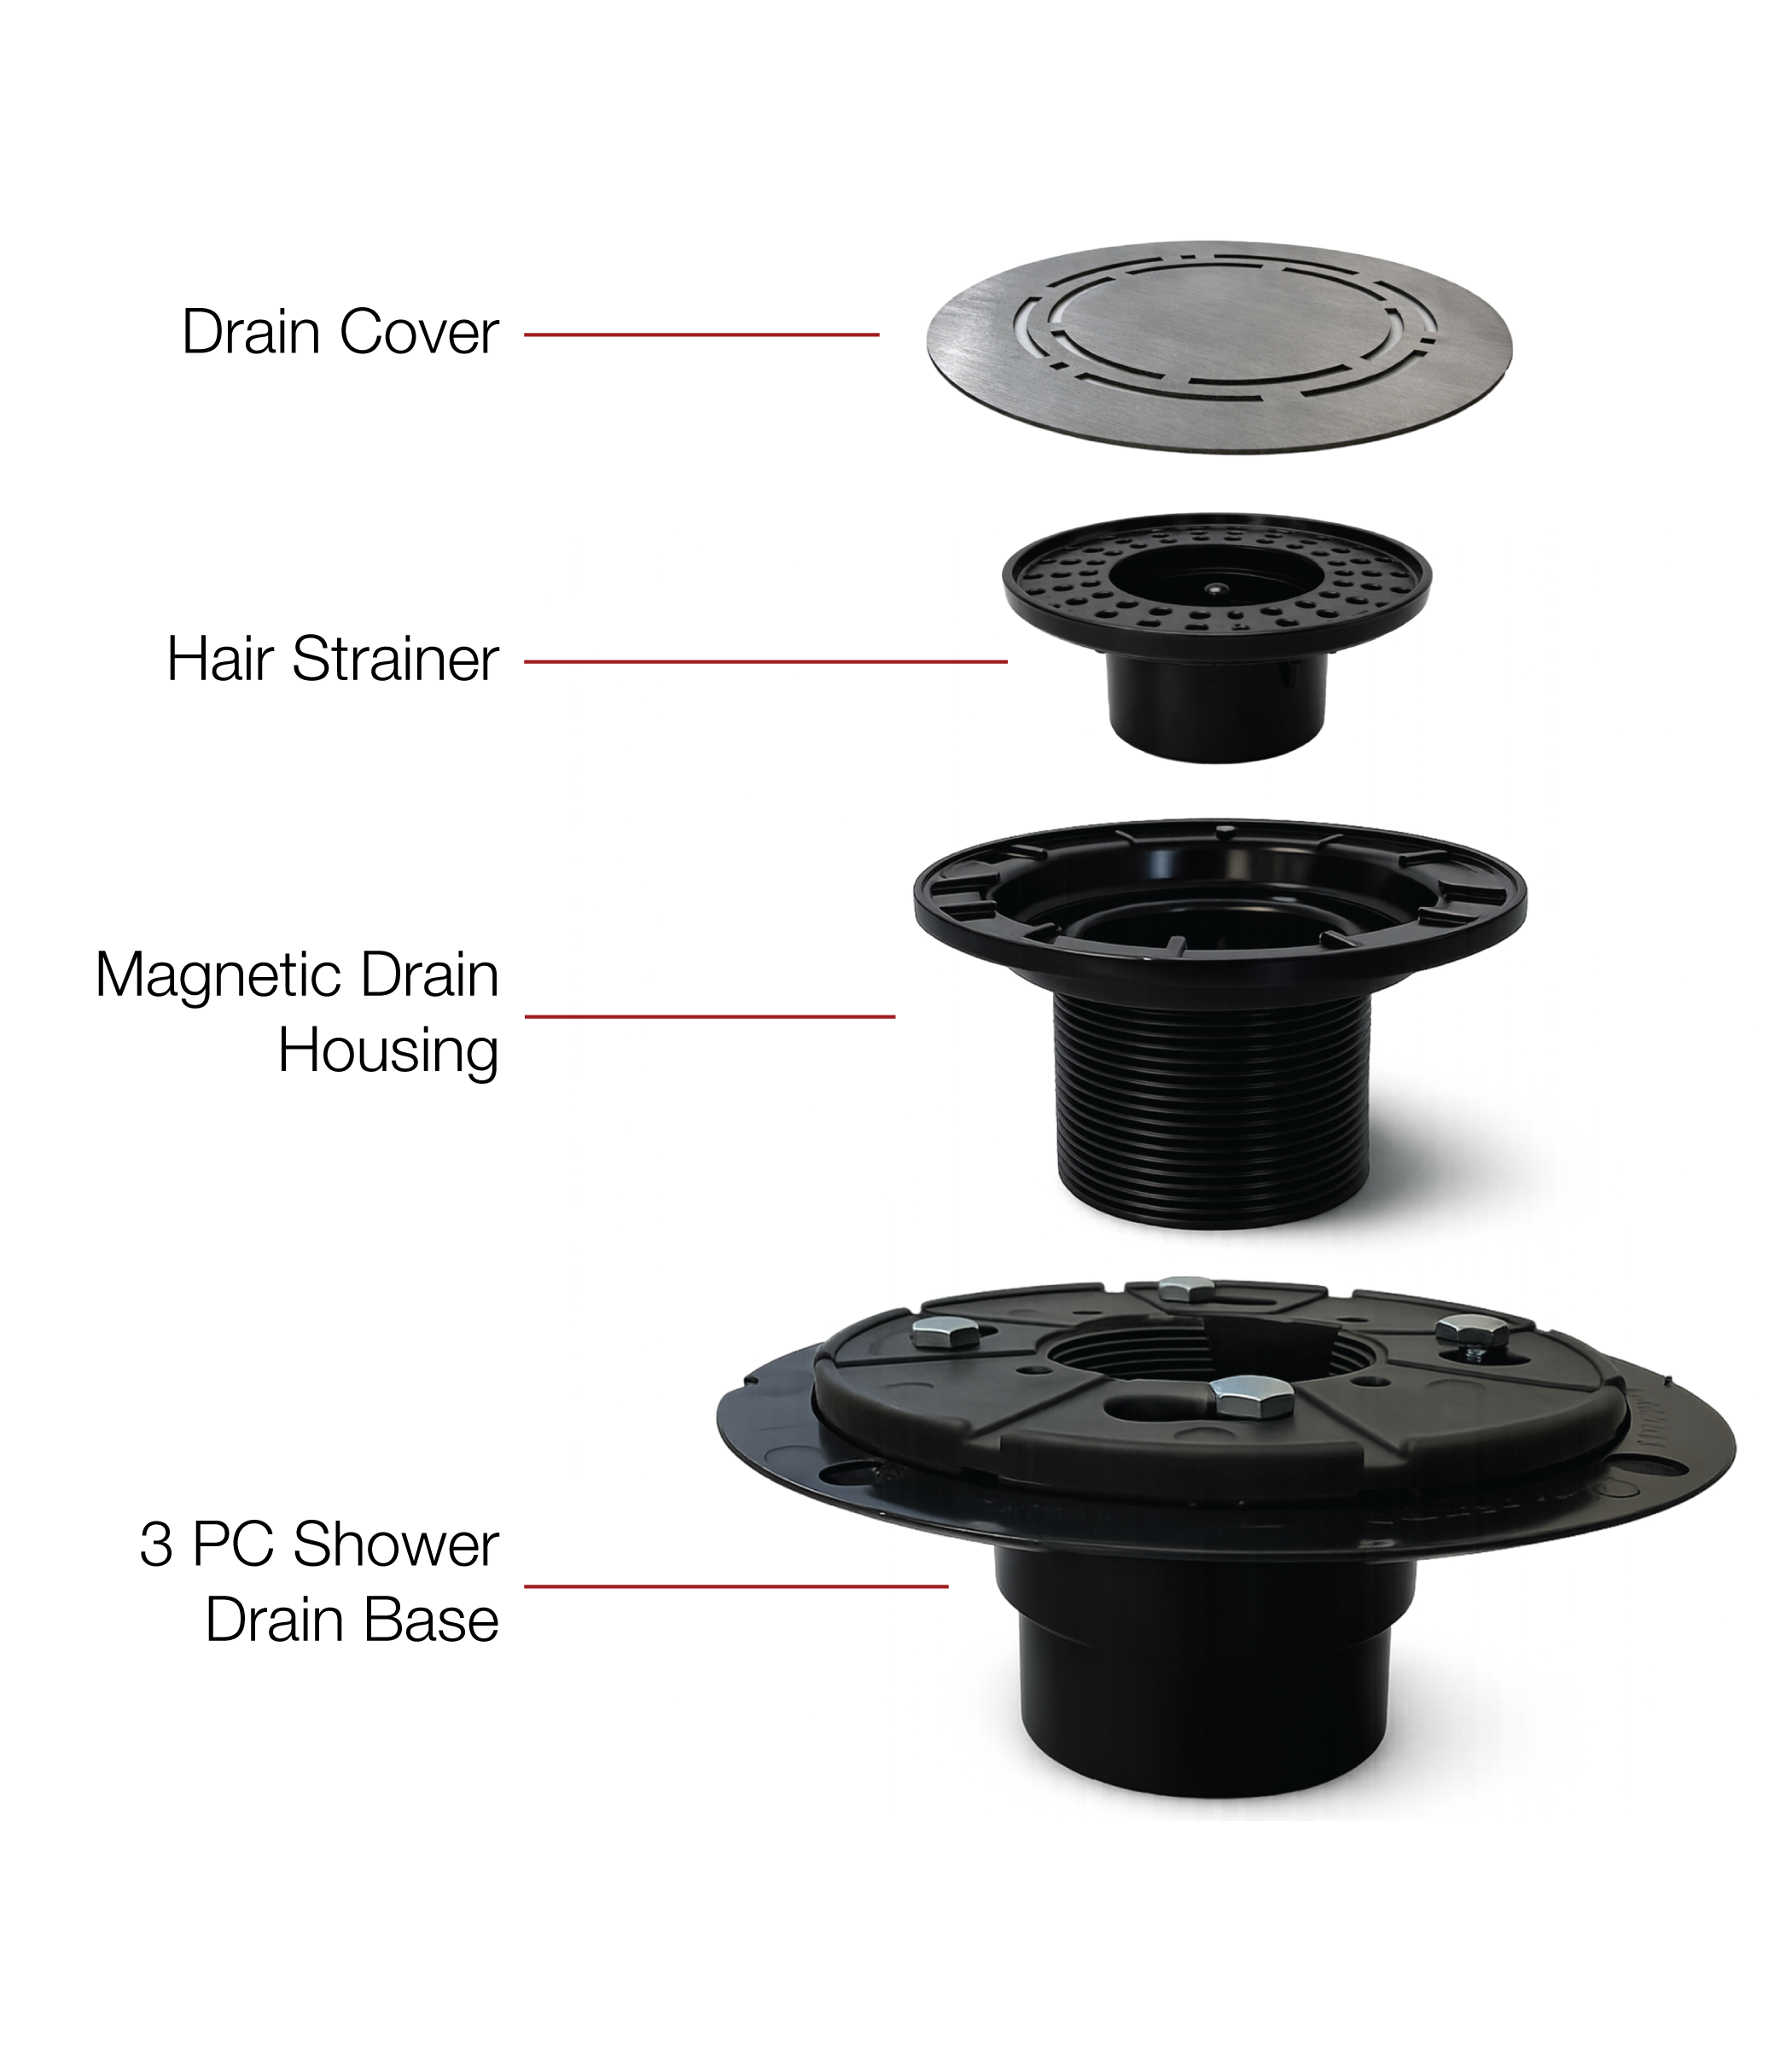
Removable hair strainer
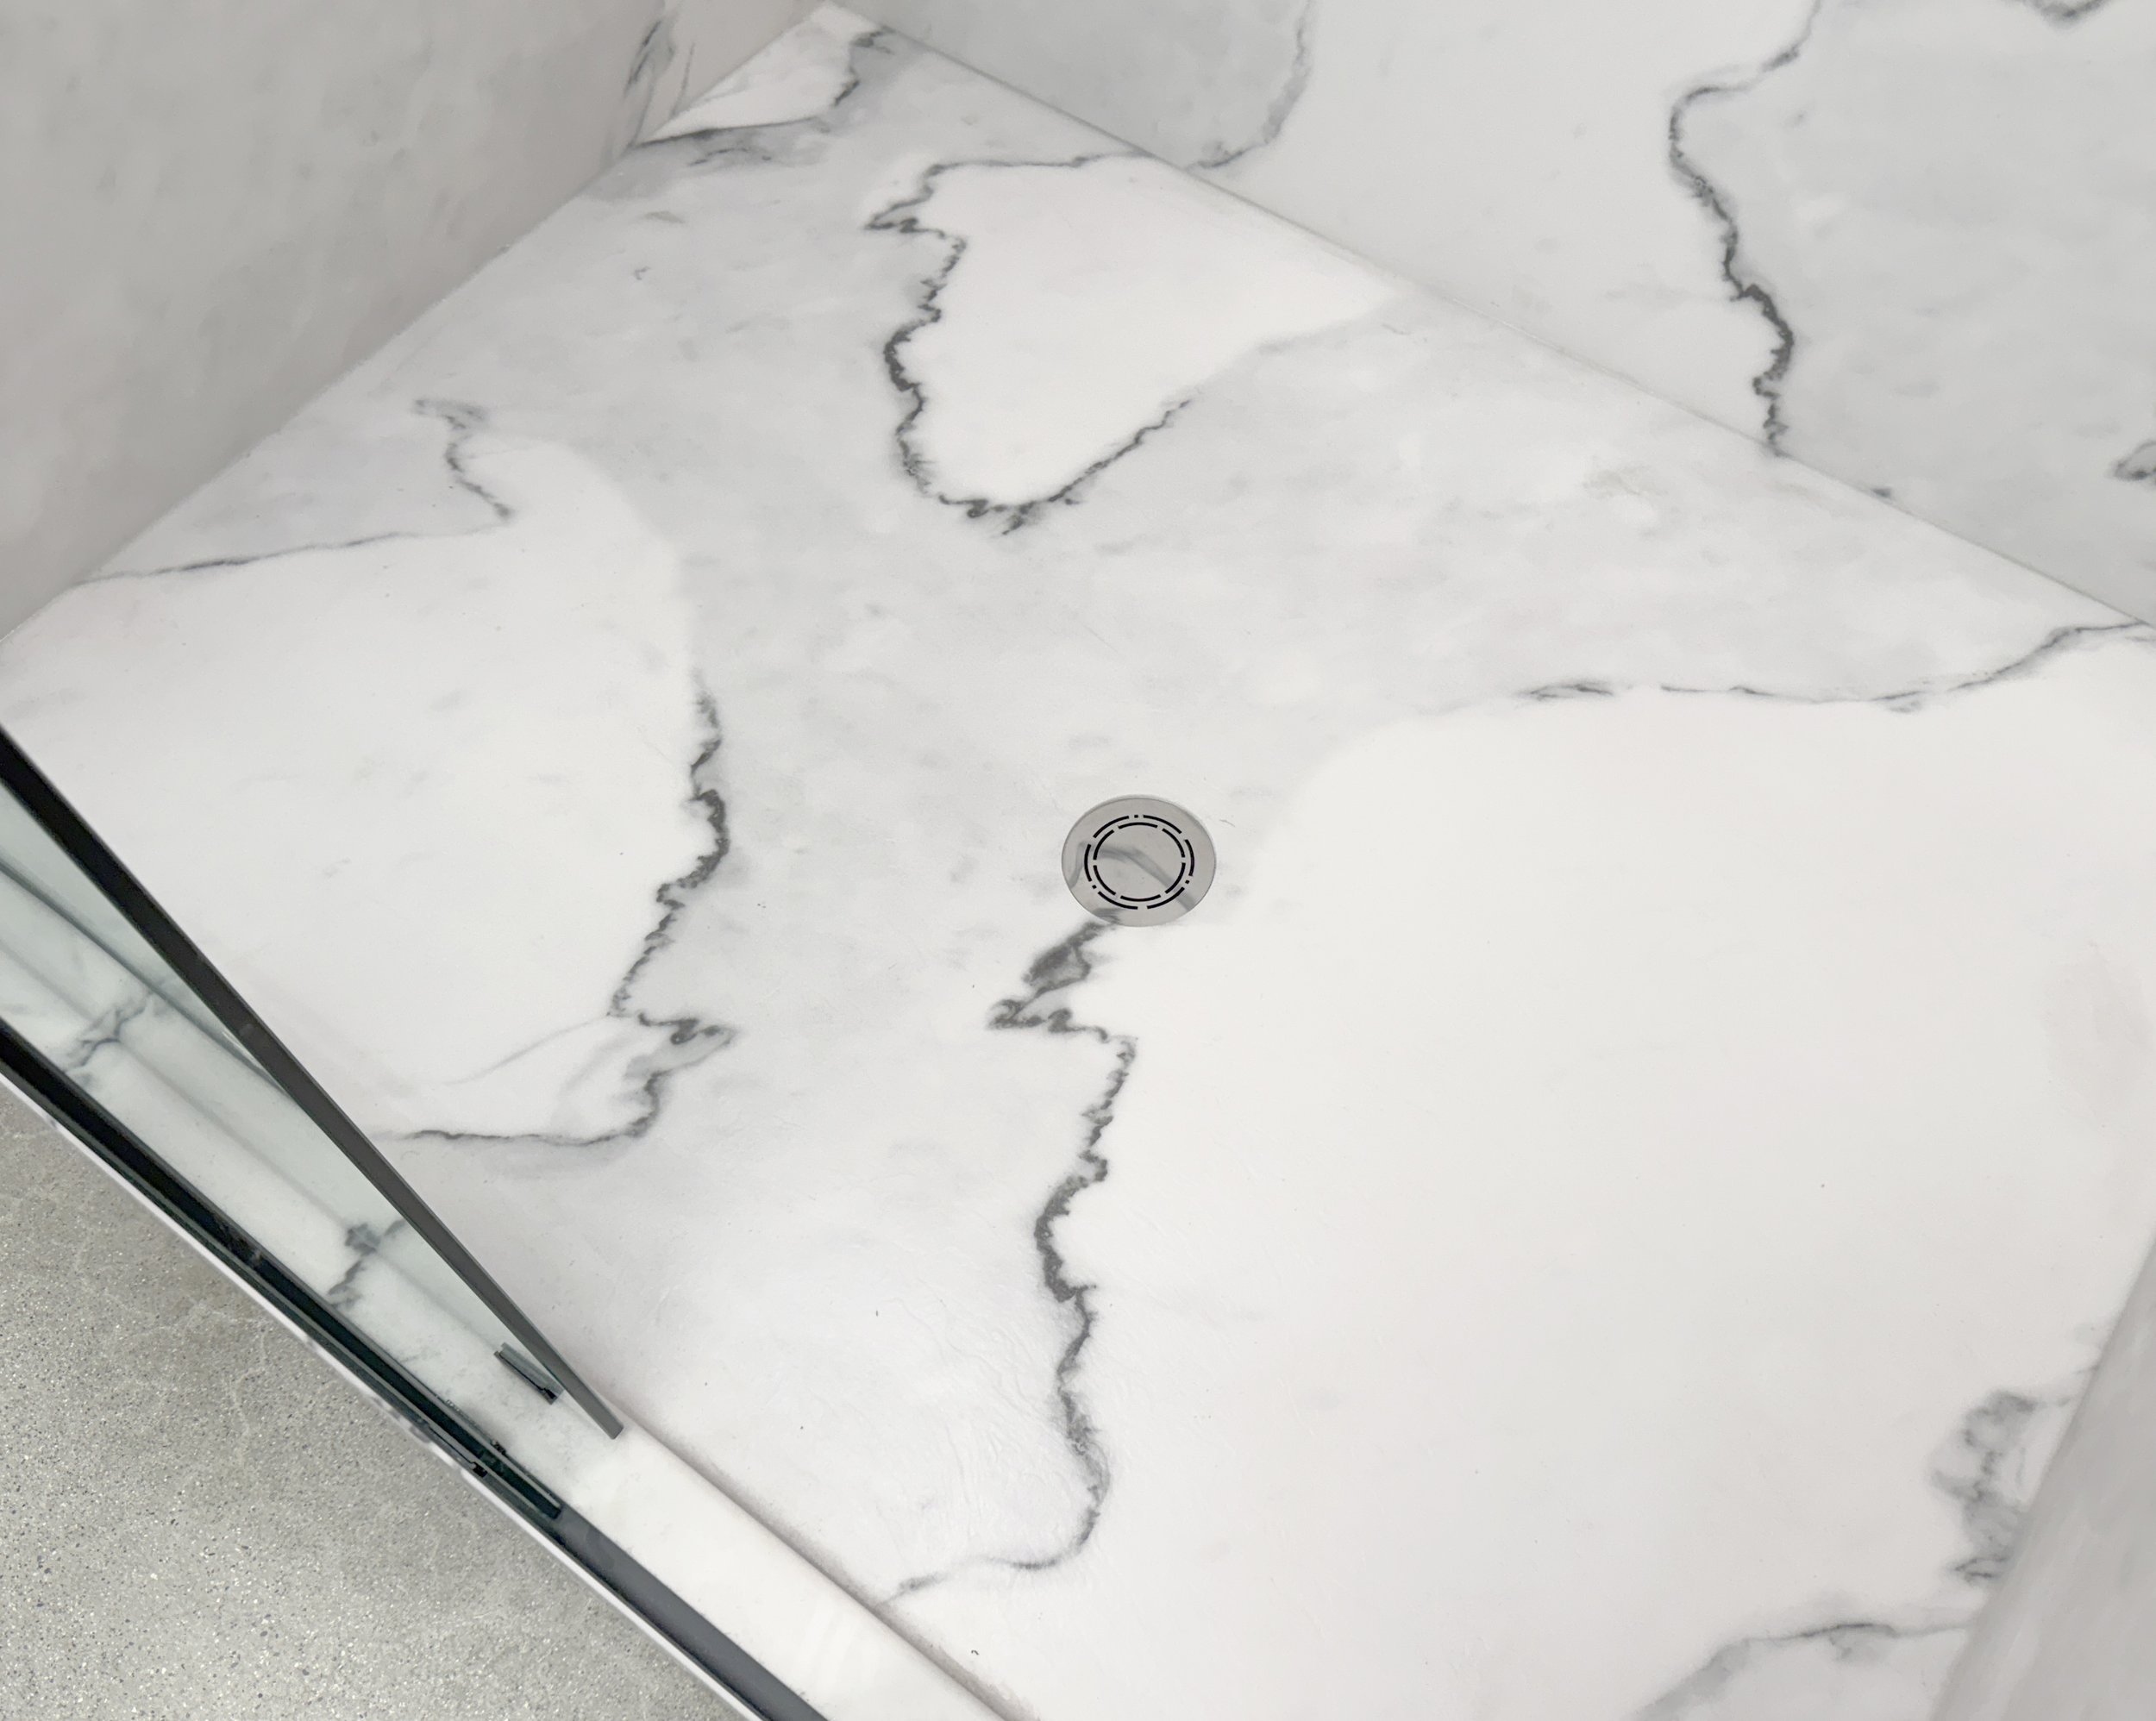
Unlimited Possibilities meet Modern Magnetic Engineering
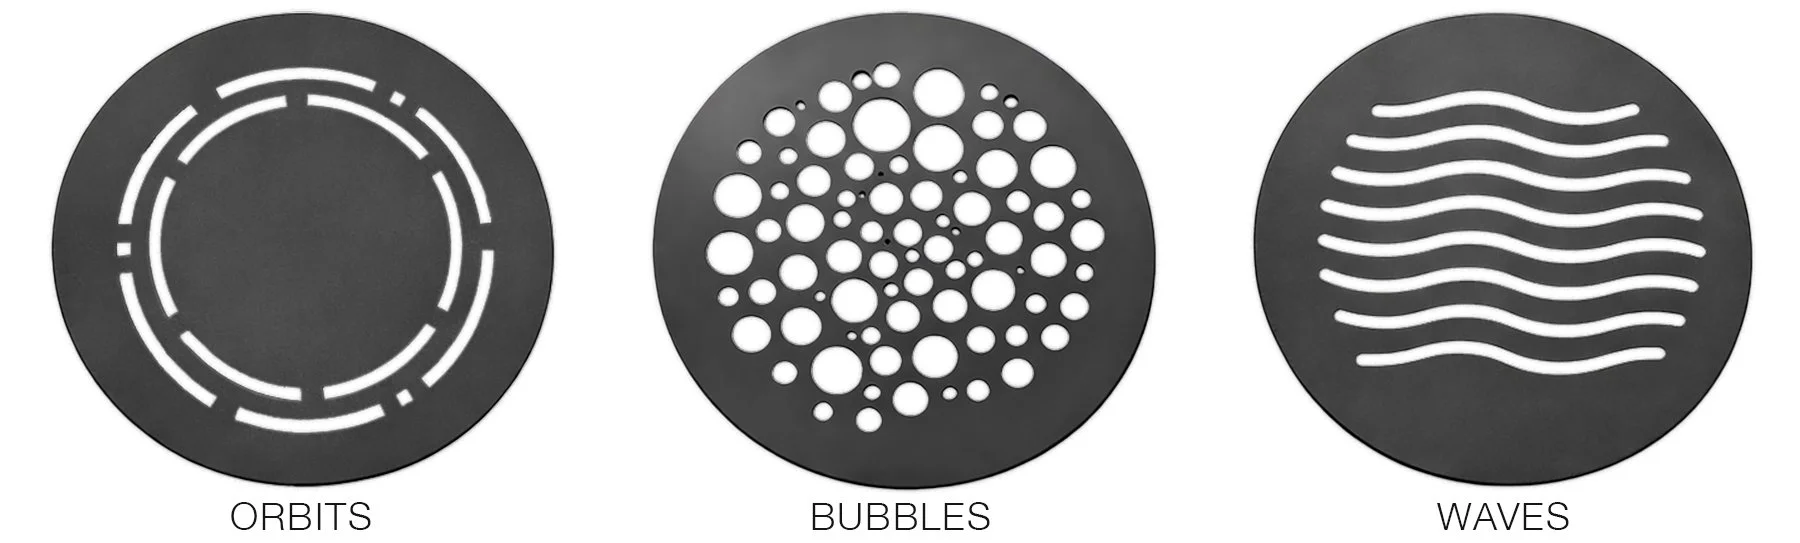
Shower Drain Pattern Options
Shower Drain Finish Options

Tyvarian Magnetic Shower Drains are compatible with:
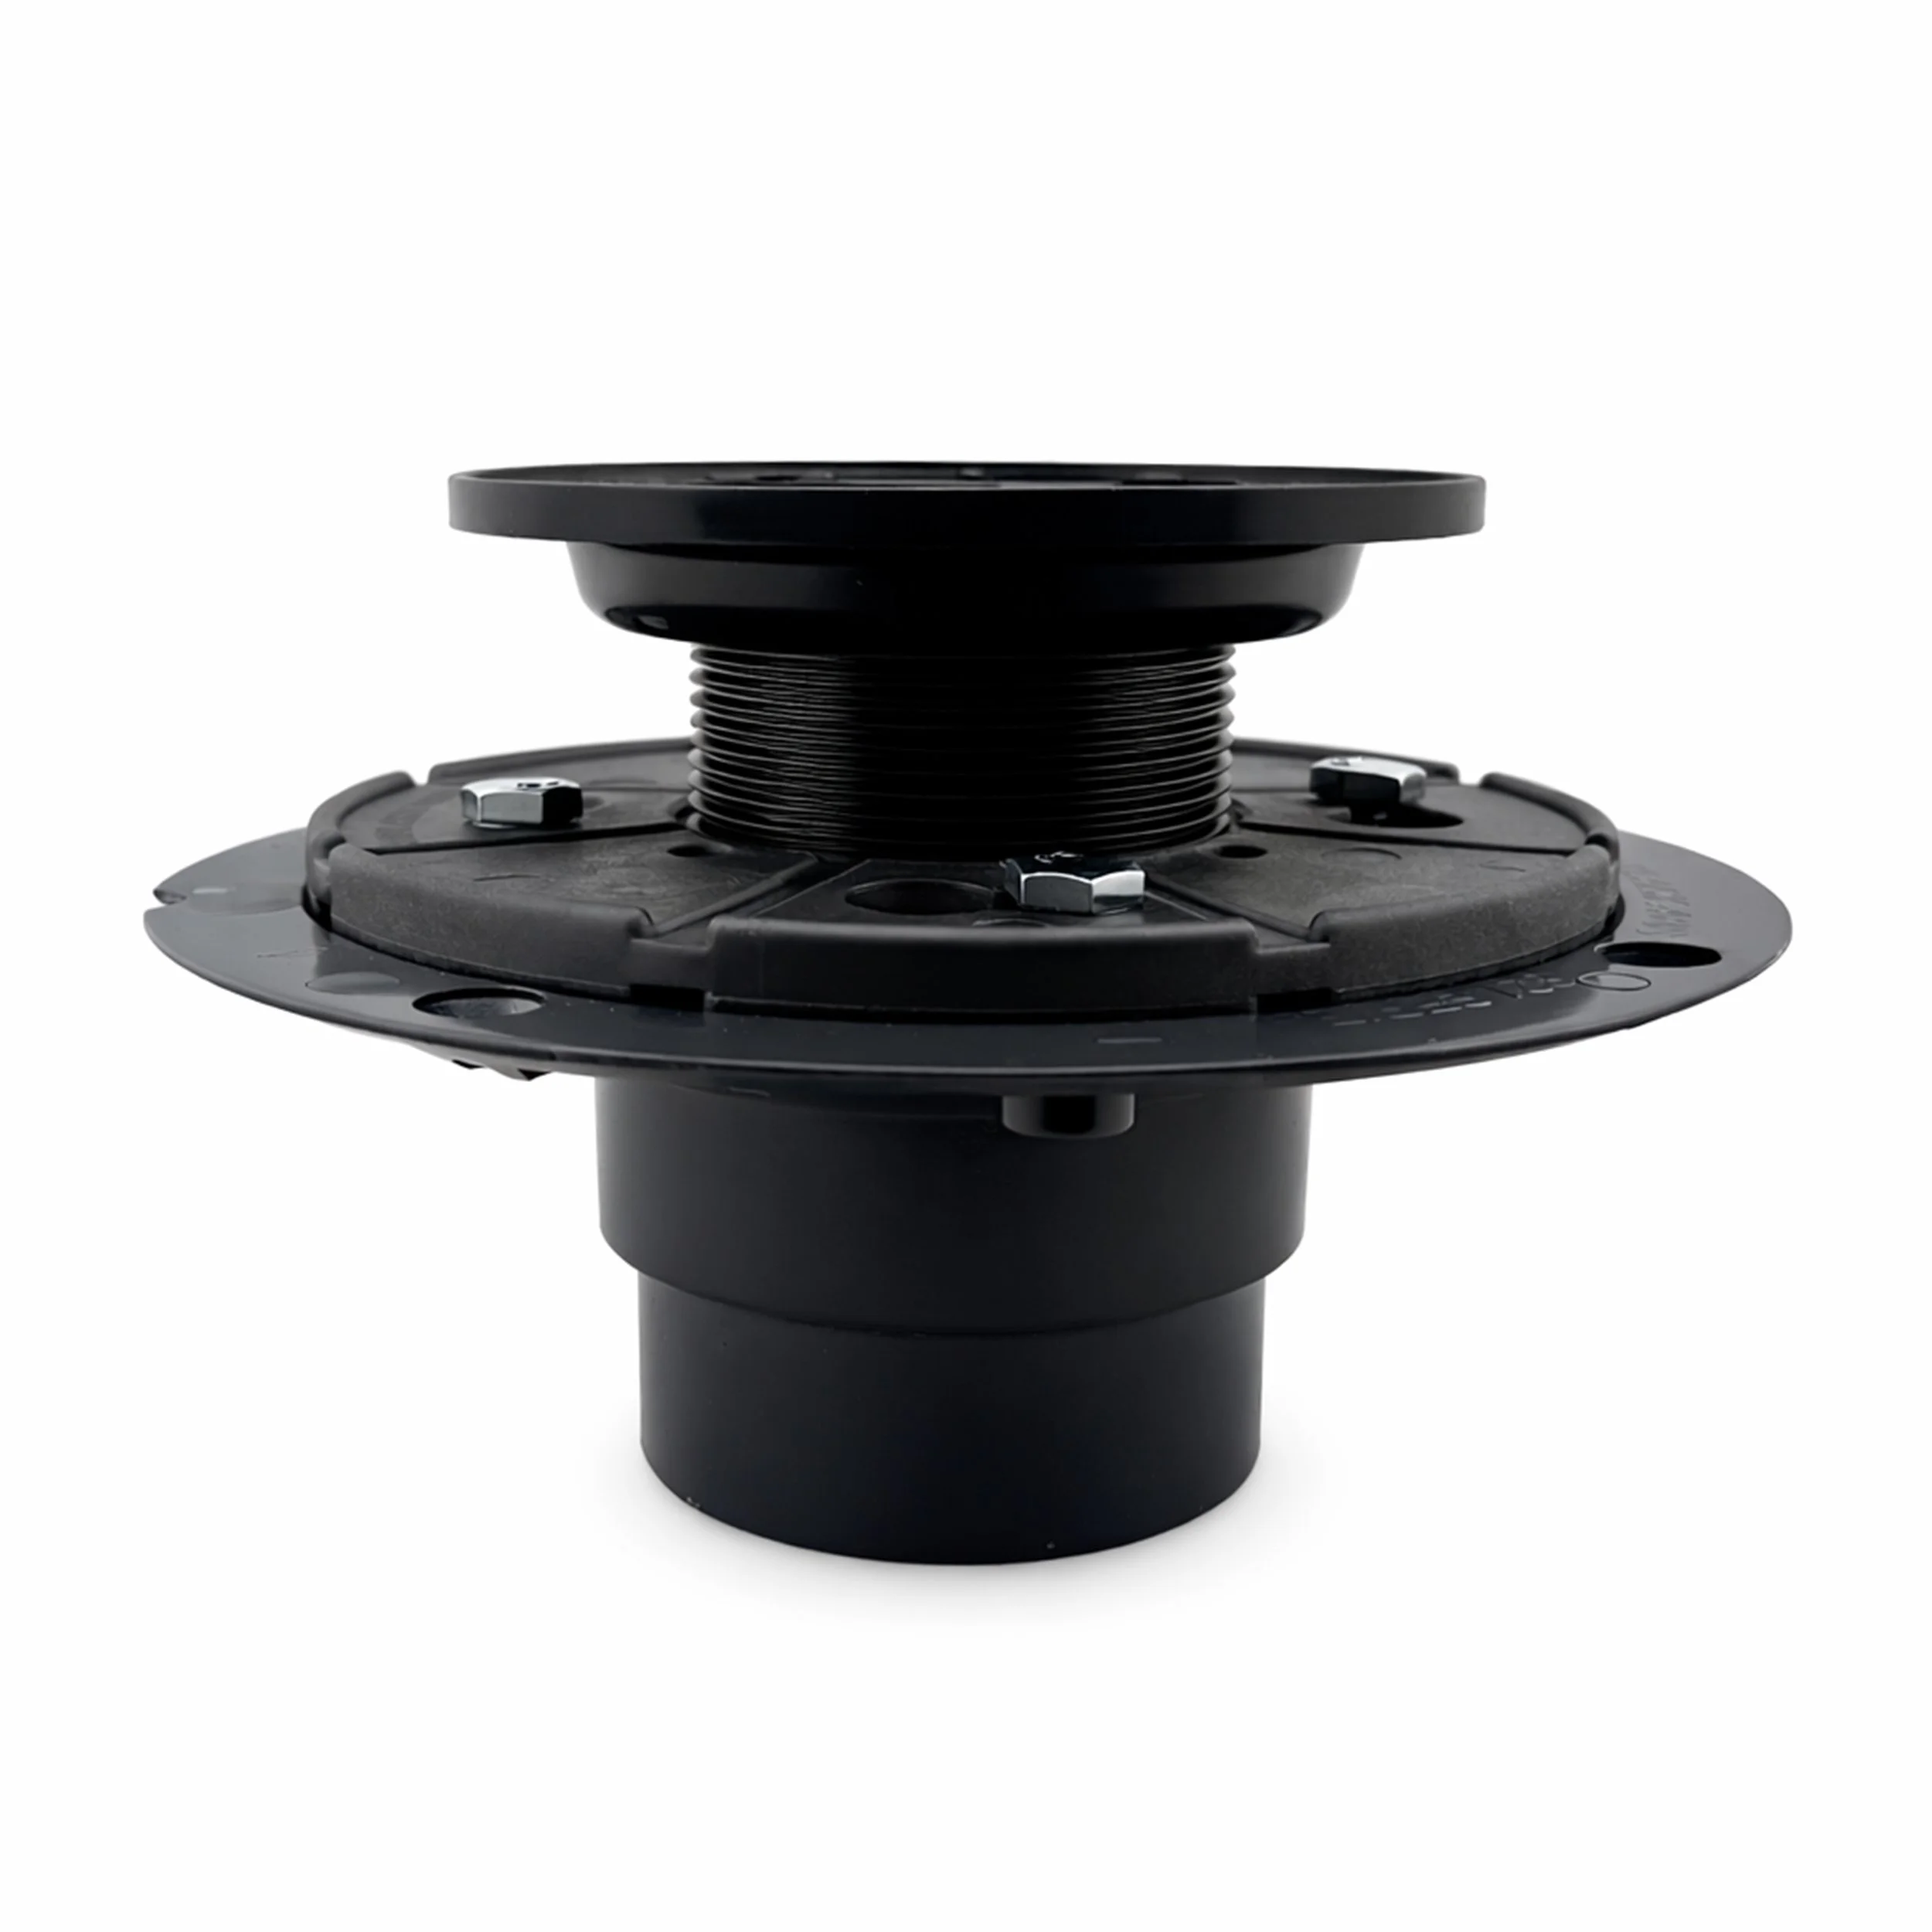
3-piece drain setups (Sioux Chief and Oatey)
2-piece (no-caulk) Shower Drain (Sioux Chief)
Compatibility
Want to update your floor without replacing the whole shower?
Tyvarian Magnetic Shower Drains are easy to install and can be retrofitted with your current plumbing.
2 Piece Drain
3 Piece Drain
Want to update your floor without replacing the whole shower?
Tyvarian Magnetic Shower Drains are easy to install and can be retrofitted with your current plumbing.
2-Piece Magnetic Drain Kit
Installation Guide
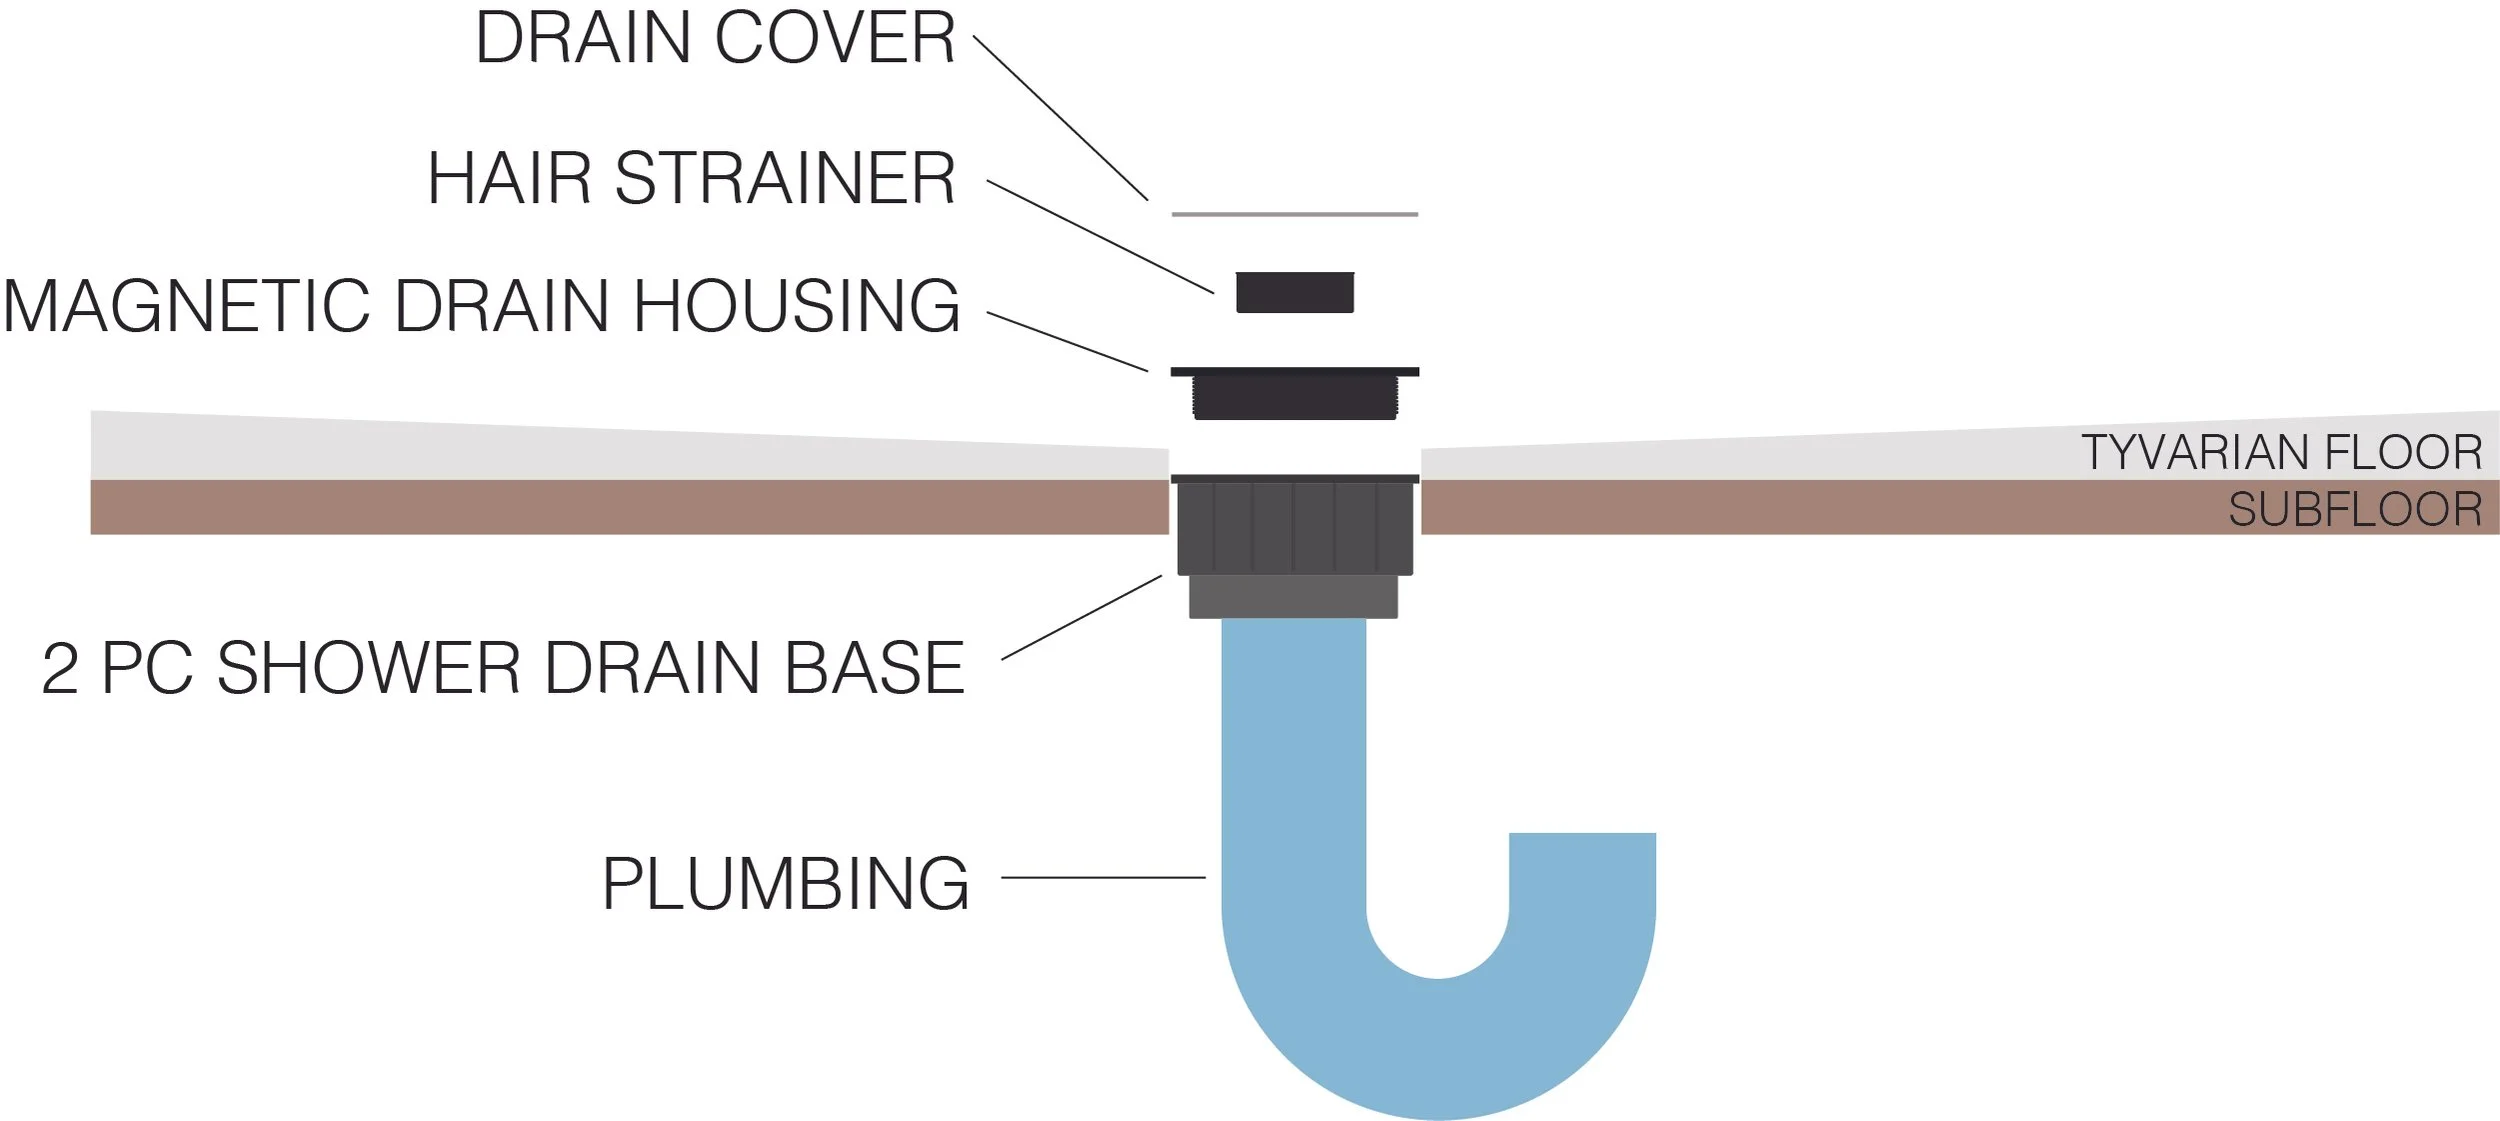
Step 1 – Install the Drain Housing
Install the 2-piece drain housing according to standard plumbing practices (ABS to ABS, PVC to PVC). Ensure the drain body is level and securely connected to the drain pipe.
Step 2 – Complete the Shower Floor
Install the Tyvarian shower floor around the drain, maintaining the proper slope toward the drain opening.
Step 3 – Install the Magnetic Drain
Apply silicone to the lip of the hole in the shower floor to create an additional seal. Thread the magnetic drain body into the drain housing using the included installation tool, placing the rubber gasket between the drain housing and drain body. Adjust the height until the drain flange sits flush with the finished shower floor.
Tip: The threaded drain body allows for minor height adjustments to achieve a flush, finished appearance.
Step 4 – Install the Magnetic Cover
Place the magnetic drain cover onto the drain body. The integrated magnets automatically align and securely hold the cover in place.
Step 5 – Cleaning & Maintenance
To clean the drain, simply lift off the magnetic cover, remove any debris from the drain opening, and replace the cover. The magnetic design allows for quick, tool-free access for routine maintenance.
3-Piece Magnetic Drain Kit
Installation Guide
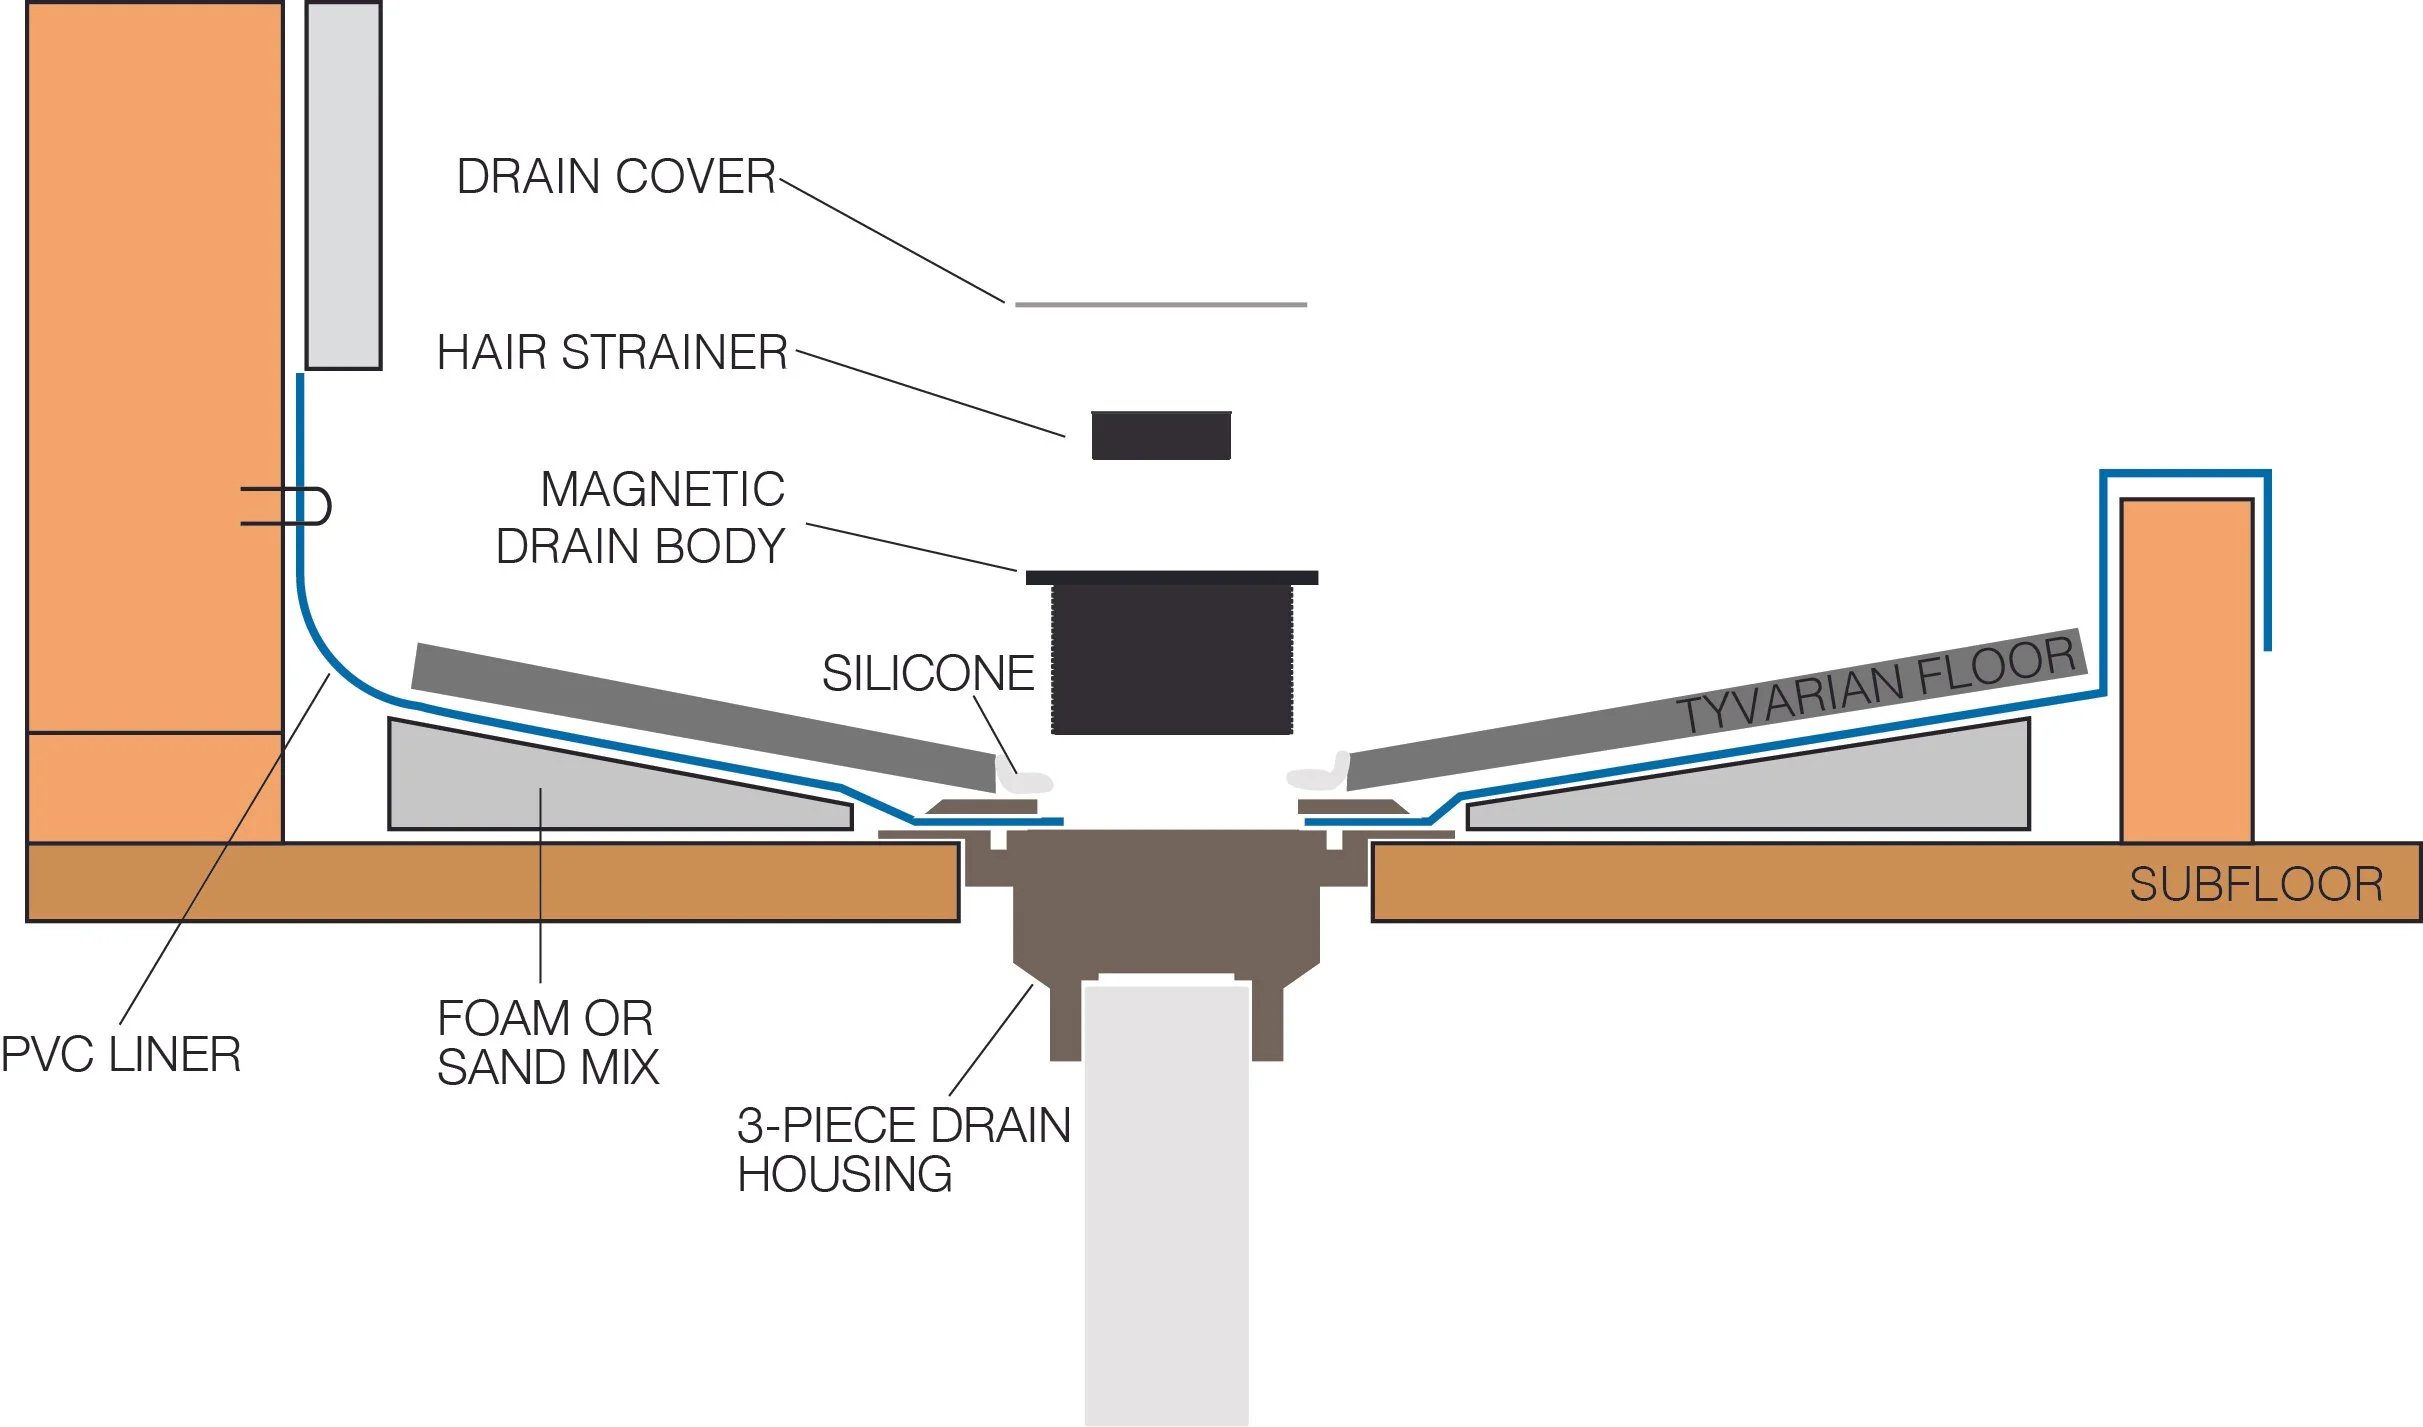
Step 1 – Install the Drain Housing
Install the 3-piece drain housing according to standard plumbing practices. Ensure the drain body is level and securely connected to the drain pipe.
Step 2 – Install the Shower Liner
Place the PVC liner over the pre-slope and cut an opening for the drain. Install the clamping ring to securely sandwich the liner between the drain housing and clamping ring, creating a watertight seal.
Tip: Apply a bead of silicone between the drain housing and PVC liner before tightening the clamping ring.
Step 3 – Complete the Shower Floor
Install the final mortar bed (or approved shower floor material) around the drain, maintaining the proper slope toward the drain opening. Allow the floor to cure according to the manufacturer's recommendations.
Step 4 – Install the Magnetic Drain
Thread the magnetic drain body into the drain housing using the included installation tool. Adjust the height until the drain flange sits flush with the finished shower floor. Install the hair strainer.
Step 5 – Install the Magnetic Cover
Place the magnetic drain cover onto the drain body. The integrated magnets automatically align and securely hold the cover in place. To clean the drain, simply lift off the cover, remove the hair strainer, clean as needed, and reinstall.